Planning guide 2026
How to Plan a Student Research Project: Timeline and Checklist
A four-week example and copyable checklist for moving from an assignment question to a reviewed submission.
Plan a student research project by working backward from the due date and naming the outputs needed along the way. Allow time to understand the assignment, choose a question, find and evaluate sources, organize notes, draft, revise, and prepare the final submission. Give each stage a visible result so your plan describes progress you can recognize.
A research schedule is useful when it helps you decide what to do next. “Research all week” is difficult to evaluate. “Find initial sources and write a question for approval” gives you something to complete and review. The plan should also leave room for the reading to change your question or reveal a gap in your evidence.
This planning guide includes a four-week research project timeline and a copyable checklist. The schedule is illustrative, not a university requirement or a guarantee that every project fits four weeks. Adapt it to your assignment, access to sources, course expectations, and available time. Your instructor's requirements take priority.
Read the assignment before building the schedule
Record the actual output: a research paper, report, presentation, poster, or combination. Note the due date, expected length, required source types, citation style, and any earlier checkpoints. A proposal due before the final paper belongs in the plan as its own deliverable.
Check how the work will be assessed. If the rubric emphasizes comparison of sources, your notes should support comparison. If it requires a presentation, reserve time to select and explain the findings for an audience. A schedule that allocates all available time to the written draft can leave the final format unprepared.
List commitments that affect your availability. Other assignments, work, travel, and access to library materials can change when focused sessions are realistic. Start with your real week rather than an ideal one. You can revise the plan as circumstances change, but it should be plausible when you first create it.
Copy the four-week research project timeline
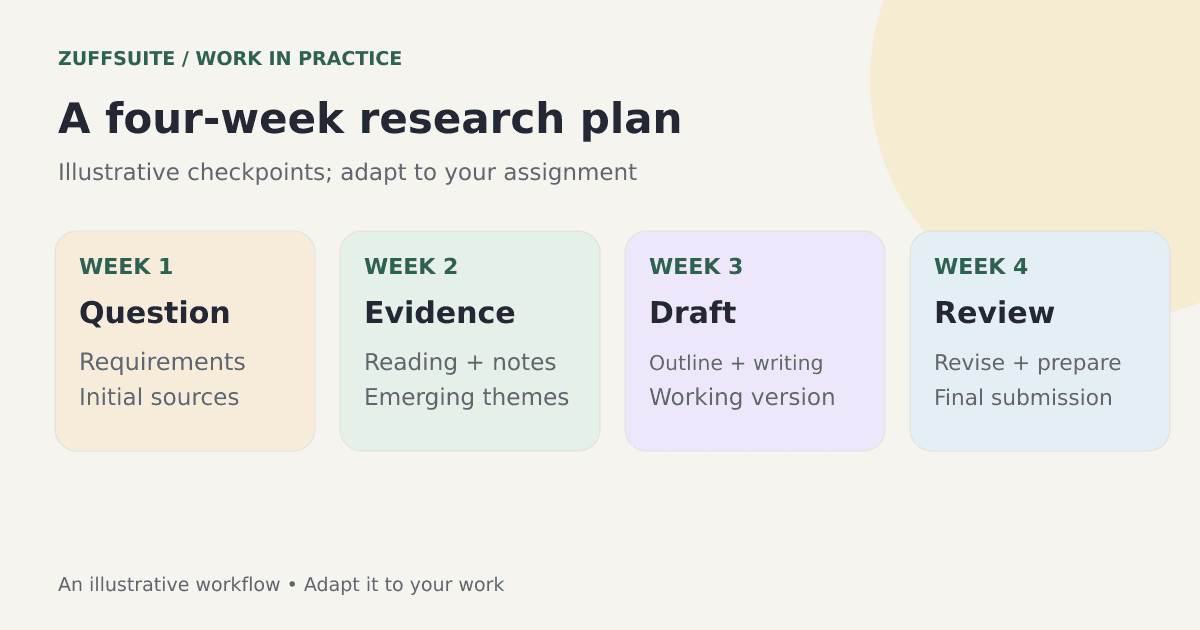
Use this as a starting point when you have roughly a month. The stages can overlap: you may refine the question while reading, or outline before every source note is complete. The checkpoints help you notice what remains unresolved.
| Period | Main work | Visible checkpoint | Questions to review |
|---|---|---|---|
| Week 1 | Understand requirements, choose a question, find initial sources | Question and starting source list | Is the question focused and answerable? |
| Week 2 | Read, evaluate sources, organize evidence | Source notes and emerging themes | What evidence is missing or contradictory? |
| Week 3 | Outline and draft the argument | Complete working draft | Does each section answer part of the question? |
| Week 4 | Revise, check attribution, prepare final format | Reviewed submission and any required slides | Have requirements and final files been checked? |
Week 1
- Main work
- Understand requirements, choose a question, find initial sources
- Visible checkpoint
- Question and starting source list
- Questions to review
- Is the question focused and answerable?
Week 2
- Main work
- Read, evaluate sources, organize evidence
- Visible checkpoint
- Source notes and emerging themes
- Questions to review
- What evidence is missing or contradictory?
Week 3
- Main work
- Outline and draft the argument
- Visible checkpoint
- Complete working draft
- Questions to review
- Does each section answer part of the question?
Week 4
- Main work
- Revise, check attribution, prepare final format
- Visible checkpoint
- Reviewed submission and any required slides
- Questions to review
- Have requirements and final files been checked?
Keep the dates visible in your own copy. “Week two” becomes more useful when it corresponds to specific days you can work. Download the research planning worksheet to record your dates, checkpoints, and next actions.
This plan gives the final week a clear purpose beyond finishing sentences. It is time to inspect the argument, verify sources and citations, check the submission format, and practice any presentation. Those actions need space in the schedule, even if you begin some of them earlier.
Week 1: choose a question and test the scope
Begin with the assignment's topic or area, then turn it into a question you can investigate within the required output. A topic such as “student learning” is broad. A question about how a particular group chooses study environments gives you a clearer place to begin, though the exact wording should follow your course expectations.
Look for initial sources to test whether the question is practical. You are checking access, relevance, and the shape of the available evidence. If the topic is too broad, narrow it. If you cannot find suitable material, discuss the question with your instructor or librarian before committing to a detailed argument.
Record the question as provisional when appropriate. Reading can reveal that a term needs a clearer definition or that your planned comparison is not supported by the available sources. A schedule should allow that refinement instead of treating the first question as a permanent promise.
End the week with a short checkpoint: the current question, an initial source list, and the next reading priority. If approval is required, include the submission and expected response in the timeline. A waiting decision can affect the work you should schedule next.
Week 2: turn reading into usable notes
Choose reading sessions with a purpose. For each source, ask what it contributes to your question and how you will locate the relevant passage again. Record important metadata and a page or section reference while you have the source open. A folder of saved files is not yet an evidence base you can draft from.
Use the research notes organization guide to separate source information, summaries, quotations, and your interpretation. That structure helps you preserve attribution while grouping ideas into themes. It also makes gaps easier to see before you begin a full draft.
Review the sources as a collection. Do they discuss the same population or context? Are key terms used consistently? Do different findings reflect different questions or methods? You may need more reading, a narrower question, or a clearer explanation of the limits of your comparison.
By the end of this stage, aim to have source notes and a short list of possible themes. You do not need to know every sentence of the final paper. You do need enough verified material to build a reasonable outline and understand what still requires investigation.
Week 3: outline the argument and complete a working draft
Give each main section a question or purpose. Under it, write the point you plan to make and the source notes that support it. Include opposing evidence or limitations where relevant. This helps you see whether the draft will answer the research question or simply summarize readings one after another.
Draft from the outline while keeping the source records nearby. Mark an unresolved citation or check clearly in your working copy. Do not invent a reference to keep the paragraph moving. Return to each marker during revision, and remove or change claims that you cannot substantiate.
Try to reach a complete working version rather than endlessly polishing the opening. A full draft makes structural problems easier to recognize. You can see whether one section is disproportionately long, whether the conclusion follows from the evidence, or whether an important part of the question remains unanswered.
If you use drafting assistance, treat it as support for organizing and expressing your own verified material. Our AI document assistant guide explains that workflow. Check suggestions against your assignment's rules and the underlying sources before adopting them.
Week 4: revise the reasoning and prepare the submission
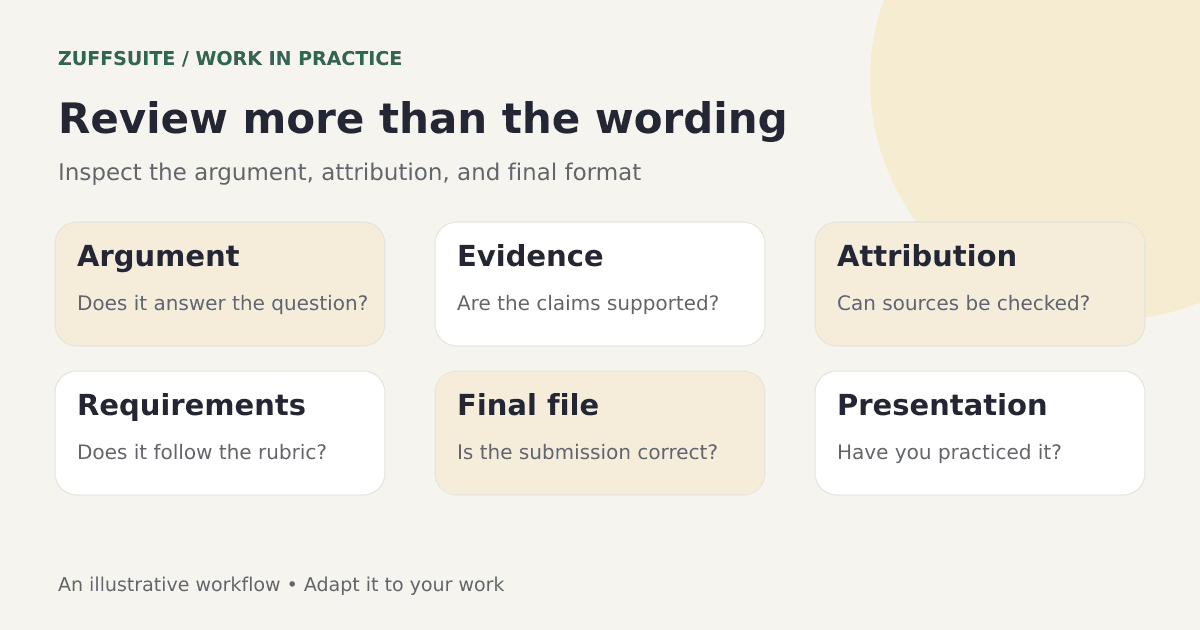
Read the draft first for its overall argument. Does it answer the question? Are the main sections connected? Does the conclusion stay within what the evidence supports? Correct those issues before spending all your time adjusting individual sentences.
Then inspect attribution and accuracy. Check quotations against the originals, confirm that references identify the sources you used, and apply the required citation style. Make sure figures, captions, and image credits follow the assignment's requirements. Organization supports this work but does not perform it automatically.
Prepare the final file and inspect it in the form you will submit. Check headings, page order, images, tables, and any required naming convention. Confirm how and where submission happens. Leaving a small amount of time for file preparation can prevent a finished assignment from becoming a last-minute technical scramble.
If you also need slides, choose the central question and the most relevant findings. Reserve time to rehearse. An audience needs a clear sequence and explanation, not the entire paper copied into a presentation. Adjust the length to the time you have been given.
Build a weekly checklist you can actually use
Keep the checklist close to your working material. Use it to notice the next action, not to claim completion before a required check has happened. If a task depends on feedback or access to a source, record that dependency beside it.
- Requirements are recorded, including the final format and earlier checkpoints.
- The research question is focused enough for the assignment.
- Relevant sources are accessible and evaluated for the task.
- Important notes remain connected to their sources and locators.
- The outline identifies the purpose and evidence for each main section.
- A complete draft exists, with unresolved checks clearly marked.
- The argument and source attribution have been reviewed.
- Final files and any presentation have been prepared and inspected.
At the end of a session, leave a specific next action. “Compare the two notes about access to study spaces” is easier to begin than “continue research.” A clear starting point can matter as much as a carefully designed month-long plan.
Adjust the plan when time is shorter
For a shorter assignment, compress the stages without skipping the essential decisions. Understand the requirements, find suitable evidence, organize it, draft, and check the result. You may use shorter sessions and a smaller number of themes, subject to what the assignment requires.
When a project is already behind schedule, identify the current state honestly. Which required output is missing? Which uncertainty blocks the next stage? Choose the next action that reduces that uncertainty. A new calendar is useful only if it responds to the work that actually remains.
For a larger project, add intermediate checkpoints rather than simply extending every stage. You might need a proposal, supervisor discussion, data access, or multiple review rounds. Check those requirements with the appropriate course or project guidance instead of assuming this four-week example covers them.
Keep the project together in ZuffSuite
You can keep planning notes and drafts in Documents, a timeline or source overview in Sheets, and your final slides in Presentations. Use recognizable names for the assignment so the materials are easy to find. The plan can remain a personal system that you update as the work changes.
Start with the worksheet and the next checkpoint. You can browse ZuffSuite templates for useful structures, or visit ZuffSuite for students for the broader academic use case. Check the current pricing page for available plans rather than assuming a separate student subscription is required.
Frequently asked planning questions
Should I finish all my reading before outlining?
You can sketch an outline early and revise it as the evidence develops. An early outline helps reveal gaps, but it should not force you to keep an unsupported claim. Treat it as a working structure that remains accountable to the reading.
What if my question changes halfway through?
Check how the change affects scope, sources, and required approvals. Update the plan and ask for guidance where the assignment requires it. Preserve useful notes, but reassess whether they still support the new question rather than carrying every old section into the draft.
Are assignment calculators useful?
They can offer a starting sequence based on dates. The University of Minnesota Libraries' Assignment Calculator is a relevant example. Review any generated schedule against your actual assignment and availability, then turn the stages into specific work you can recognize.
How do I start today?
Write the due date, the required output, and the nearest missing checkpoint. Choose one concrete action that moves toward it. You can create a ZuffSuite workspace to keep the plan beside your research, but the first useful step is understanding what the next session needs to produce.
About this guide: ZuffSuite used AI-assisted drafting to prepare this article. The diagrams and worked examples illustrate the method; they are not customer case studies. Linked references provide background, and the worksheets are available for you to adapt.
Keep exploring
More guides for your work
Step-by-step tutorial Oct 3, 2026
How to Organize Research Notes for Papers and Presentations
Keep evidence connected to sources, compare ideas by theme, and turn organized notes into a useful outline.
Read the guide
Evaluation guide Sep 27, 2026
AI Document Assistant for Small Business: What It Can Do and What to Look For
A practical look at document-aware and workspace-aware AI: what it can do, where it needs human review, and what to test before a small team relies on it.
Read the guide
How-to guide Sep 27, 2026
How to Write an SOP for a Small Business: Template, Examples & Best Practices
A good SOP makes a repeatable process easier to perform correctly, not just easier to describe. Here is a nine-part structure, a full example, and the mistakes to avoid.
Read the guideA workspace for what comes next
Bring your research and next steps together.
Organize notes, shape a document, work through your data, and prepare to present it from one student workspace.