Step-by-step tutorial 2026
How to Organize Research Notes for Papers and Presentations
Keep evidence connected to sources, compare ideas by theme, and turn organized notes into a useful outline.
To organize research notes, keep each piece of evidence connected to its source, then group useful ideas by the questions or themes your assignment must address. A source record helps you find where information came from. A thematic outline helps you decide what that information means for your paper or presentation. You need both to move from reading to writing.
Saving more material is not always the next useful step. You might already have several articles, highlighted passages, and pages of notes while still feeling unable to start a draft. The problem may be that everything is stored in the order you found it, rather than in a form that supports the argument you are trying to build.
This tutorial gives you a research notes template, a worked example, and a method for turning organized evidence into an outline. It applies to coursework, personal research, and professional learning. Follow your assignment's requirements for sources and citations. The example records below are fictional and demonstrate organization; they are not research findings to cite.
Define what your notes need to help you answer
Write the research question near the top of your project. Add the expected output, due date, and any requirements that affect your reading. A short paper and a five-minute presentation may use the same sources but require different levels of detail. Knowing the final task helps you choose which notes deserve attention.
Suppose your assignment asks how students choose a study environment. Start with a question that leaves room for evidence: “What factors shape students' choices of study environment?” That is more useful than assuming quiet spaces are always better and collecting only material that supports the assumption.
Keep a short list of open questions as you read. You might need evidence about access, distractions, personal preferences, or the type of work being done. These questions guide your notes without forcing every source into a fixed conclusion. Update them when your reading reveals an important distinction you had not considered.
If the whole assignment still feels too large, begin with the student research project timeline. Scheduling research and organizing its evidence are related tasks, but they need different decisions.
Make one recognizable record for each source
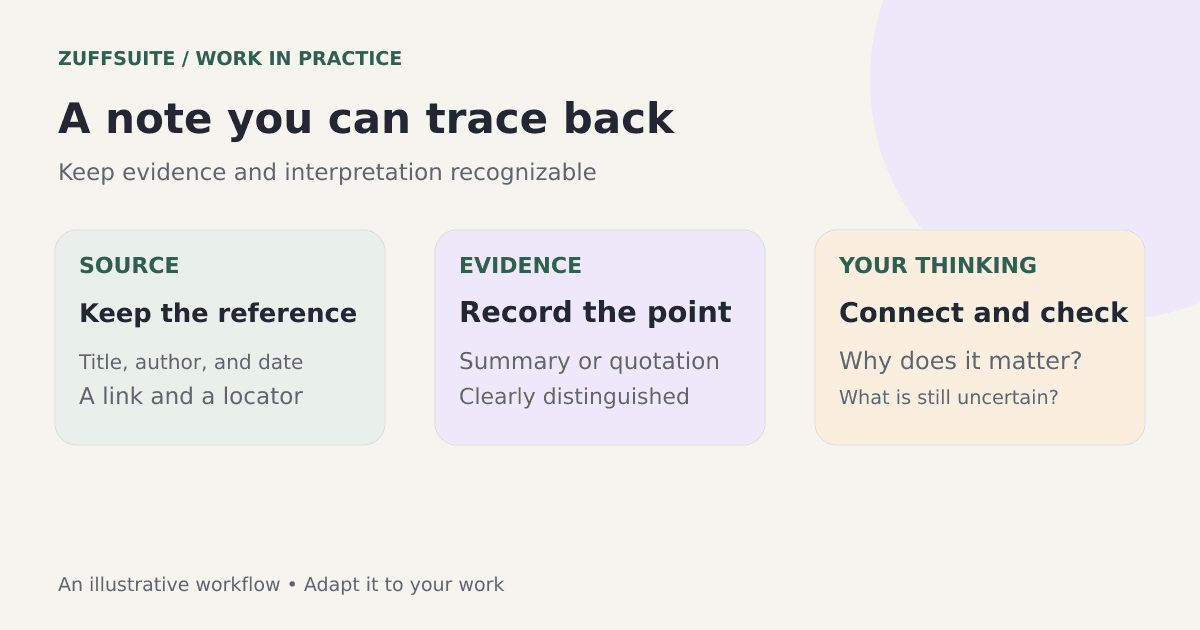
Give each source a simple identifier, such as S01, followed by a meaningful title. Record the author, publication date, title, link, and whatever bibliographic information your required citation style needs. Do this while the source is open. Reconstructing those details after drafting can interrupt an otherwise productive session.
Add a locator to any note based on a specific passage: a page number, section heading, paragraph identifier, or another way to find it again. A link to a long document may not be enough. Your future self should be able to inspect the evidence without repeating the search that first brought you to it.
Distinguish source metadata from your interpretation. Metadata answers “Which source is this?” Your notes answer “What does it contribute?” You can store them together, but make their roles obvious. That distinction becomes especially helpful when several sources have similar titles or discuss the same topic from different perspectives.
Use a research notes template that keeps evidence traceable
Copy this structure into a document for each substantial source, or use the same fields as columns in a table. You do not have to complete every field for every reading. Choose the fields that help you evaluate and use the source for your actual task.
- Source ID and title: a recognizable reference for the reading.
- Author, date, and link: enough information to identify the original source.
- Locator: the page or section supporting the note.
- Relevant point: a short summary in your own words.
- Exact quotation: optional, clearly marked and copied accurately.
- My interpretation: why the point matters to the research question.
- Theme or planned section: where this evidence might be useful.
- Limitations and checks: what remains uncertain or needs verification.
Keep quotations visually distinct from summaries. If exact wording matters, preserve it with quotation marks and a locator. If you are summarizing, write your own explanation and check that it accurately reflects the source. Do not let a copied sentence drift into your draft as if you wrote it.
The University of Toronto's guide to organizing literature includes spreadsheet approaches for recording source information and notes. That is a useful academic reference when you need to adapt this structure to a literature review.
Work through one note before collecting dozens
Imagine a fictional source called “Student Choices of Study Spaces.” Your first note says that the source discusses access to quiet areas, convenience, and the type of task a student plans to complete. You mark the relevant section as “Discussion of participant preferences.” The note demonstrates the structure, not a verified empirical result.
Your interpretation might be: “Study location could depend on more than noise. I should compare practical access with personal preferences.” That sentence belongs in the interpretation field. It is a direction for further thinking, not a fact established simply because you wrote it down.
Then add an open question: “Does this source distinguish individual reading from group work?” Return to the source to check. If it does not answer the question, keep the limitation visible. You can look for another source without overstating what the first reading contributes.
| Field | Fictional example |
|---|---|
| Source ID | S01 — Student Choices of Study Spaces |
| Relevant point | Discusses several reasons for choosing a study location |
| Locator | Discussion of participant preferences |
| Interpretation | Compare access, preferences, and task requirements |
| Theme | Choosing a suitable environment |
| Open check | Does the reading separate individual and group tasks? |
Source ID
- Fictional example
- S01 — Student Choices of Study Spaces
Relevant point
- Fictional example
- Discusses several reasons for choosing a study location
Locator
- Fictional example
- Discussion of participant preferences
Interpretation
- Fictional example
- Compare access, preferences, and task requirements
Theme
- Fictional example
- Choosing a suitable environment
Open check
- Fictional example
- Does the reading separate individual and group tasks?
This small example is enough to test whether your template supports thinking. If every field feels like copying the entire article, reduce the detail. If you cannot tell why a note matters, add a sentence connecting it to your question.
Group ideas by theme without losing their sources
After a few readings, create a second layer organized by themes. A theme is a useful grouping for comparison, such as “access to spaces” or “different tasks need different conditions.” It is not just a folder with an attractive name. It should help you see relationships between notes.
Reference the source IDs beneath each theme. You can summarize the relationship in a sentence, then point back to the detailed notes. That avoids copying whole passages into several places and wondering which copy has the most recent correction.
Do not force agreement. One source may use a different population, ask a different question, or define a concept differently. Record the distinction before deciding that two readings contradict each other. A research notes organizer is valuable partly because it makes those differences easier to inspect.
Keep a temporary theme for unresolved material if needed, but revisit it. Otherwise it becomes a collection of interesting notes that never help the assignment. Decide whether each note belongs in a useful theme, needs more checking, or can stay outside the final argument.
Turn themes into a paper outline
Choose the main question each section should answer. Under that question, write a provisional point and list the supporting source IDs. Add a counterpoint or limitation where relevant. You now have an outline driven by the task rather than a paragraph-by-paragraph tour of the readings.
For the fictional study-environment example, an outline might cover access, task differences, and preferences. Before drafting, check whether each section has enough verified evidence. A theme with only an untested assumption needs more work, while a theme with ten near-identical notes may need selection rather than further reading.
Write a short paragraph explaining the connection between two notes. This is a useful bridge from organization to synthesis. Instead of “Source A says this, and Source B says that,” ask what comparing them helps the reader understand. Keep the underlying records available so your interpretation remains accountable to the evidence.
Use our AI document assistant guide if you want help shaping a draft. Provide the relevant notes and check the output against the originals. Drafting assistance does not establish that a source exists, that a quotation is exact, or that your interpretation is justified.
Adapt the same notes for a presentation
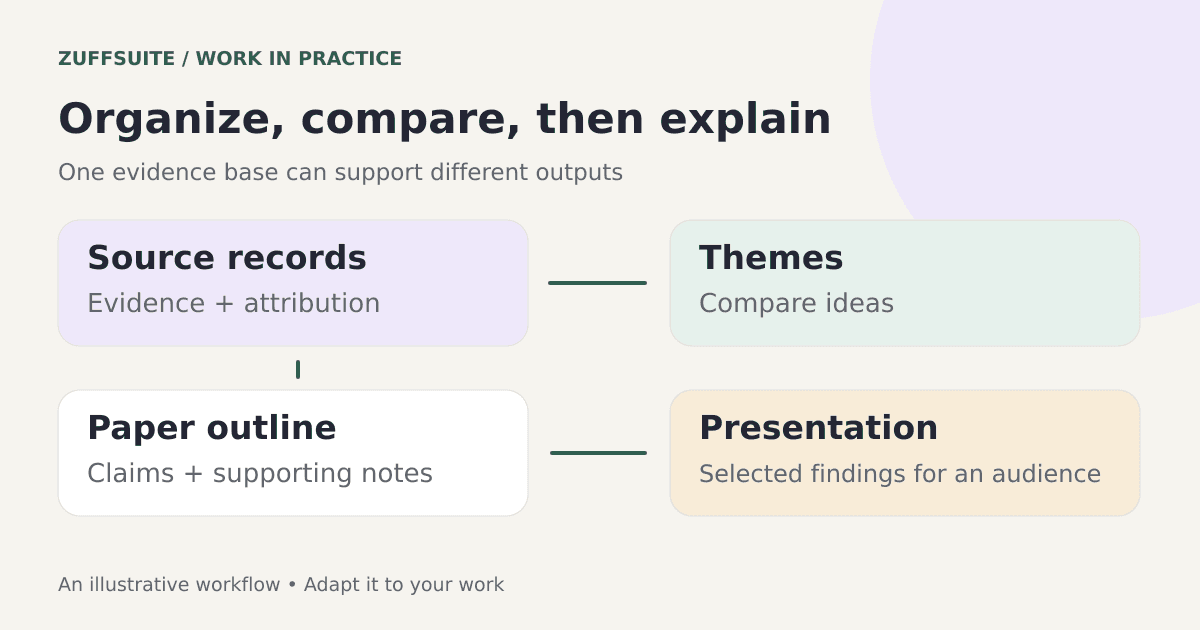
A presentation is usually more selective than a paper. Start with the central question and the few findings your audience needs to follow. Use your themes to choose the sequence. The source records remain the evidence base, while the slides become a concise explanation for the audience.
For each proposed slide, ask what the audience should understand after seeing it. A heading such as “Why access matters” gives you a clearer purpose than “Literature review, part two.” Decide whether the slide needs a diagram, a short quotation, a comparison, or simply a clear spoken explanation.
Do not put every research note on the slides. Keep additional detail in your speaking notes or supporting document where appropriate. Check any claims, images, and citations used in the presentation according to your course or publication requirements. Clear organization makes that check easier but does not replace it.
Build a manageable research workspace
In ZuffSuite, Documents can hold source notes and the working draft, Sheets can hold a structured overview, and Presentations can hold the final slides. Choose a consistent way to label the project and its source records. Enter the source information you need and keep the connections understandable to you.
The workflow can remain manual: organize the source records, select useful notes, then move the verified ideas into the draft or slides. You do not need to assume automatic citation generation or conversion between tools. Begin with the copyable structure here, then explore the available templates if you want another starting point.
Make the workspace easy to resume. At the end of a reading session, leave a note about the next useful action: check a passage, compare two sources, or draft a particular section. A well-organized archive is helpful, but an explicit next action is what makes tomorrow's work easier to start.
Common questions about organizing research notes
Should I organize notes by source or by theme?
Use source records to preserve attribution and thematic notes to compare ideas. Relying on sources alone can make drafting feel like listing readings. Relying on themes alone can make it difficult to recover the evidence behind a statement. The two layers solve different problems.
How detailed should each note be?
Write enough to understand the contribution and find the original passage. A brief relevant note can be more useful than a long summary of material you will not use. Add detail when it helps explain the source's method, limits, or relationship to your question.
What should I do with a note that does not fit?
Check whether it raises an important question or simply sits outside your scope. Keep valuable background separate from material selected for the assignment. You can retain a note without giving it a place in the final paper. Selection is part of organizing research, not evidence that the reading was wasted.
Can this method work without a specialized research app?
Yes. The important elements are recognizable source records, clear distinctions between evidence and interpretation, and a useful outline. A document and a simple table can support that structure. If you want those materials alongside your drafts and slides, start a ZuffSuite workspace and use the same method there.
About this guide: ZuffSuite used AI-assisted drafting to prepare this article. The diagrams and worked examples illustrate the method; they are not customer case studies. Linked references provide background, and the worksheets are available for you to adapt.
Keep exploring
More guides for your work
Planning guide Oct 3, 2026
How to Plan a Student Research Project: Timeline and Checklist
A four-week example and copyable checklist for moving from an assignment question to a reviewed submission.
Read the guide
Evaluation guide Sep 27, 2026
AI Document Assistant for Small Business: What It Can Do and What to Look For
A practical look at document-aware and workspace-aware AI: what it can do, where it needs human review, and what to test before a small team relies on it.
Read the guide
Field guide Sep 26, 2026
AI Office Suite for Small Business: What to Look for in 2026
A practical guide to evaluating documents, spreadsheets, forms, presentations, connected workflows, and AI before a small team switches tools.
Read the guideA workspace for what comes next
Bring your research and next steps together.
Organize notes, shape a document, work through your data, and prepare to present it from one student workspace.