Student field guide 2026
How to Organize a College Group Presentation: Roles, Slides, Deadlines & Checklist
Divide the work fairly, build one clear slide story, and finish with time to rehearse. Includes a three-student example and a free planning kit.

To organize a college group presentation, read the rubric together, agree on one outline, assign an owner and reviewer to each deliverable, and work backward from the presentation date. Divide the workload by research effort and speaking time, then schedule two rehearsals before submission.
If your group is arguing about who gets which slides, cannot find a meeting time, or keeps editing different versions, start with a one-page plan. Write down the question, deadline, student names, slide responsibilities, and next checkpoint. Everyone should confirm their assignment before the meeting ends.
This guide shows how to organize a college group presentation with three students, a 10-slide research example, a 14-day schedule, and a free planning kit. You can adapt the same process to a larger group or a five-day deadline.
1. Start with the assignment requirements
Before anyone designs slides, turn the assignment into a short brief. Separate the presentation date from the upload deadline: some courses require the file earlier. Check whether questions count toward the time limit and whether references count toward any slide limit.
- Record the topic, research question, rubric, presentation duration, and submission deadline, including the time zone.
- Confirm required source types, citation style, slide or file requirements, and rules for images and AI assistance.
- Check whether grades are shared, individual, or partly based on peer evaluations.
- Note whether every member must speak and how absences or changes in membership are handled.
Send unclear requirements to the instructor early. Do not let one person's interpretation become an unofficial rule. Once you receive an answer, put it in the brief so everyone plans from the same information.
2. Assign group presentation roles and responsibilities
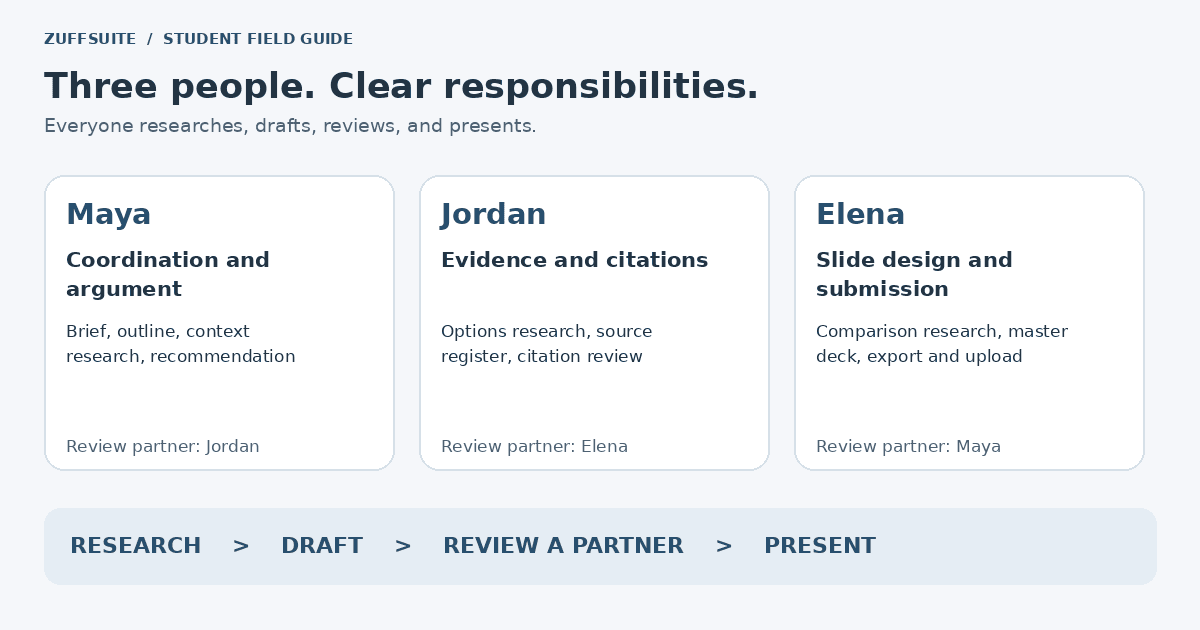
Give each task one primary owner and a review partner. The owner delivers the work; the reviewer checks it before the next stage begins. Shared accountability means everyone understands the final argument and checks the rubric. It does not mean three people vaguely own every unfinished task.
| Student | Primary role | Deliverables | Due | Reviewer |
|---|---|---|---|---|
| Maya | Coordination and argument | Brief, outline, context research, recommendation | Days 1, 5, 7 | Jordan |
| Jordan | Evidence and citations | Options research, source register, citation review | Days 4, 7, 9 | Elena |
| Elena | Slide design and submission | Comparison research, master deck, export and upload | Days 4, 8, 13 | Maya |
Maya
- Primary role
- Coordination and argument
- Deliverables
- Brief, outline, context research, recommendation
- Due
- Days 1, 5, 7
- Reviewer
- Jordan
Jordan
- Primary role
- Evidence and citations
- Deliverables
- Options research, source register, citation review
- Due
- Days 4, 7, 9
- Reviewer
- Elena
Elena
- Primary role
- Slide design and submission
- Deliverables
- Comparison research, master deck, export and upload
- Due
- Days 4, 8, 13
- Reviewer
- Maya
A coordinator should not automatically become the group's unpaid editor, researcher, and emergency backup. Count the time needed to merge slides, repair citations, and submit the file when dividing work. If Elena owns those tasks, reduce another part of her workload.
At kickoff, agree on a communication channel, realistic reply window, and method for flagging blockers. Compare actual availability around classes and jobs. When calendars conflict, collect written updates before a short decision meeting; reserve time together for reviewing the argument and practicing delivery.
The University of Nevada, Reno's group-presentation guide also recommends specific jobs, a group outline, and practice together. Use that foundation, then make each job measurable with a deliverable and date.
3. How to divide slides fairly
Equal slide counts can hide unequal work. A title slide takes less preparation than a comparison built from several research papers. Start with sections of the argument, estimate their research and preparation effort, and then balance speaking time.
For a 10-minute presentation, this example budgets about three minutes per student and leaves one minute for handoffs and flexibility. That is a planning choice, not a universal slide-per-minute rule. Test it aloud and adjust to your assignment. Reference slides can remain visible during questions without becoming another full speech.
| Slide | Purpose | Owner | Speaking focus |
|---|---|---|---|
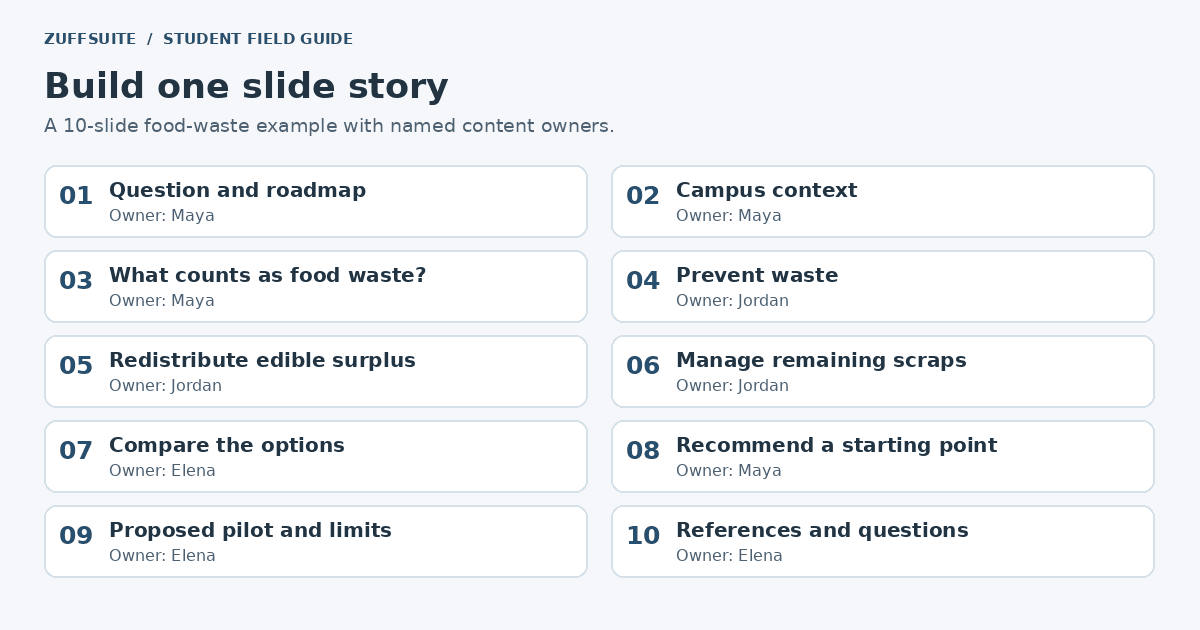
| 1 | Question and roadmap | Maya | Introduce the question and route through the deck |
| 2 | Campus context | Maya | Explain the setting; identify any missing local evidence |
| 3 | What counts as food waste? | Maya | Define the scope and distinguish edible surplus from scraps |
| 4 | Prevent waste | Jordan | Explain a prevention option and supporting evidence |
| 5 | Redistribute edible surplus | Jordan | Discuss a possible recovery route and practical constraints |
| 6 | Manage remaining scraps | Jordan | Explain composting as a separate option |
| 7 | Compare the options | Elena | Use consistent criteria: evidence, feasibility, and limitations |
| 8 | Recommend a starting point | Maya | Connect the recommendation to the comparison |
| 9 | Proposed pilot and limits | Elena | Explain what to measure and what is still unknown |
| 10 | References and questions | Elena | Show traceable sources; all students answer questions |
1
- Purpose
- Question and roadmap
- Owner
- Maya
- Speaking focus
- Introduce the question and route through the deck
2
- Purpose
- Campus context
- Owner
- Maya
- Speaking focus
- Explain the setting; identify any missing local evidence
3
- Purpose
- What counts as food waste?
- Owner
- Maya
- Speaking focus
- Define the scope and distinguish edible surplus from scraps
4
- Purpose
- Prevent waste
- Owner
- Jordan
- Speaking focus
- Explain a prevention option and supporting evidence
5
- Purpose
- Redistribute edible surplus
- Owner
- Jordan
- Speaking focus
- Discuss a possible recovery route and practical constraints
6
- Purpose
- Manage remaining scraps
- Owner
- Jordan
- Speaking focus
- Explain composting as a separate option
7
- Purpose
- Compare the options
- Owner
- Elena
- Speaking focus
- Use consistent criteria: evidence, feasibility, and limitations
8
- Purpose
- Recommend a starting point
- Owner
- Maya
- Speaking focus
- Connect the recommendation to the comparison
9
- Purpose
- Proposed pilot and limits
- Owner
- Elena
- Speaking focus
- Explain what to measure and what is still unknown
10
- Purpose
- References and questions
- Owner
- Elena
- Speaking focus
- Show traceable sources; all students answer questions
Maya has four slides, Jordan three, and Elena three, including references. Their responsibilities are balanced by Elena's design and submission work and Jordan's citation review. After the first rehearsal, compare timed delivery and remaining preparation work. Reassign a difficult slide or a design task if one person is overloaded.
Keep related explanations together where possible. A speaker should introduce a point, explain its evidence, and make its implication clear. Avoid changing speakers every slide just to create a mathematically equal count.
4. Build a realistic group presentation timeline
Work backward from the official deadline. Put research and draft deadlines before peer review, and peer review before rehearsal. A draft checkpoint should produce slides with source details and notes, not a promise that someone will finish soon.
| Day | Milestone | Owner | Definition of done |
|---|---|---|---|
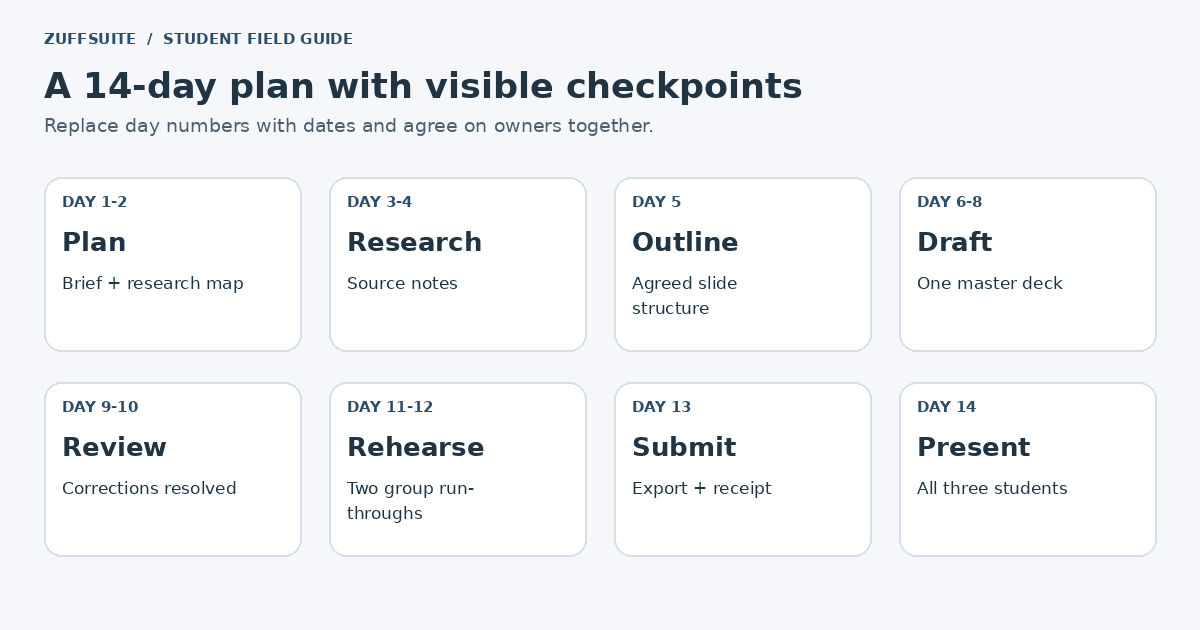
| 1 | Agree on brief, availability, roles | Maya coordinates; all confirm | Approved one-page plan |
| 2 | Divide research questions and source needs | Jordan coordinates | Research map with named owners |
| 3-4 | Read and record evidence | Each student | Source notes posted by day 4 |
| 5 | Approve the argument and slide outline | Maya; all review | One agreed 10-slide outline |
| 6-7 | Draft assigned slides and speaking notes | Each student | Complete sections by day 7 |
| 8 | Assemble one consistent master deck | Elena | Whole deck ready for review |
| 9 | Review claims, citations, and rubric | Jordan coordinates; review partners check | Specific correction list |
| 10 | Resolve the review findings | Each owner; Elena integrates | Revised deck |
| 11 | First timed group rehearsal | Maya tracks time; all speak | Timing and transition notes |
| 12 | Second rehearsal and technology check | Elena handles slides; all rehearse | Checked delivery and backup plan |
| 13 | Export, reopen, submit, verify receipt | Elena submits; Jordan verifies | Correct file and submission confirmation |
| 14 | Present and answer questions | All three | Final presentation |
1
- Milestone
- Agree on brief, availability, roles
- Owner
- Maya coordinates; all confirm
- Definition of done
- Approved one-page plan
2
- Milestone
- Divide research questions and source needs
- Owner
- Jordan coordinates
- Definition of done
- Research map with named owners
3-4
- Milestone
- Read and record evidence
- Owner
- Each student
- Definition of done
- Source notes posted by day 4
5
- Milestone
- Approve the argument and slide outline
- Owner
- Maya; all review
- Definition of done
- One agreed 10-slide outline
6-7
- Milestone
- Draft assigned slides and speaking notes
- Owner
- Each student
- Definition of done
- Complete sections by day 7
8
- Milestone
- Assemble one consistent master deck
- Owner
- Elena
- Definition of done
- Whole deck ready for review
9
- Milestone
- Review claims, citations, and rubric
- Owner
- Jordan coordinates; review partners check
- Definition of done
- Specific correction list
10
- Milestone
- Resolve the review findings
- Owner
- Each owner; Elena integrates
- Definition of done
- Revised deck
11
- Milestone
- First timed group rehearsal
- Owner
- Maya tracks time; all speak
- Definition of done
- Timing and transition notes
12
- Milestone
- Second rehearsal and technology check
- Owner
- Elena handles slides; all rehearse
- Definition of done
- Checked delivery and backup plan
13
- Milestone
- Export, reopen, submit, verify receipt
- Owner
- Elena submits; Jordan verifies
- Definition of done
- Correct file and submission confirmation
14
- Milestone
- Present and answer questions
- Owner
- All three
- Definition of done
- Final presentation
Do not schedule 'final touches' until the last possible hour. Keep day 13 as a submission buffer in this example and decide when editing stops. If the professor requires an earlier upload, shift export and submission to that date and plan rehearsal around the submitted version.
Adapt the plan to a five-day deadline
On day 1, settle the rubric, roles, question, and outline. On day 2, finish focused research and draft slide content. On day 3, assemble the deck and review sources. On day 4, revise and rehearse together. On day 5, run a brief final check, submit within the required window, and present.
Reduce scope before reducing verification. A narrower question with well-supported claims is easier to finish than a broad topic with weak evidence. Start source recording immediately, and book the rehearsal at kickoff so it survives everyone's other commitments.
5. Manage group members who don't contribute
Look for missed deliverables early. A student may be confused, overloaded, or unable to access the files. Ask what is blocking the work before deciding they are unwilling to help. Refer to the specific task and deadline so the conversation can produce a useful next step.
Agree on a revised commitment with a concrete output. If it is missed again, document the assigned task, dates, outreach, and work received. Update the plan openly when redistributing tasks; record who completed the replacement work. Keep notes factual and relevant.
Contact the instructor while there is still time to follow the course's process. Explain the impact on the assignment and ask how to proceed. Do not remove someone's name, change their grade, or exclude them from presenting on your own authority. Follow the rubric and instructor guidance.
For an absence, prepare a backup speaker who understands the section and knows where the notes are. Notify the instructor when required. A backup keeps the presentation moving; the instructor decides any attendance or assessment consequences.
6. Prevent common presentation problems
| Problem | Prevention |
|---|---|
| Inconsistent design | Choose one theme, title style, image treatment, and citation position before drafting. |
| Duplicate research | Give each question an owner and maintain a source register with links and relevant passages. |
| Broken citations | Check each factual claim against its source; include page or section details in notes. |
| Mismatched information | Define terms and compare like contexts, dates, and measures. |
| Poor transitions | Write the last sentence of one section and the first sentence of the next together. |
| Uneven speaking time | Time each section aloud; cut or redistribute explanations before the final run. |
| Last-minute file surprises | Keep one master, freeze edits, reopen the export, and check the submission receipt. |
Inconsistent design
- Prevention
- Choose one theme, title style, image treatment, and citation position before drafting.
Duplicate research
- Prevention
- Give each question an owner and maintain a source register with links and relevant passages.
Broken citations
- Prevention
- Check each factual claim against its source; include page or section details in notes.
Mismatched information
- Prevention
- Define terms and compare like contexts, dates, and measures.
Poor transitions
- Prevention
- Write the last sentence of one section and the first sentence of the next together.
Uneven speaking time
- Prevention
- Time each section aloud; cut or redistribute explanations before the final run.
Last-minute file surprises
- Prevention
- Keep one master, freeze edits, reopen the export, and check the submission receipt.
A reviewer should leave an actionable comment such as 'Slide 7 compares campus costs with a national estimate; use matching contexts or explain the difference.' 'Looks good' does not test the argument. The owner then resolves the issue and the reviewer checks the revision.
Write handoffs that carry the reasoning forward: 'Those options manage surplus after it exists. Maya will now explain why our proposal starts with prevention.' Practice the handoff with the next speaker rather than leaving it as a note nobody has spoken.
7. Worked example: three students building a research presentation
Maya, Jordan, and Elena are fictional students working on an illustrative assignment: 'How Can Universities Reduce Campus Food Waste?' Their example brief calls for a 10-minute presentation, at least six credible sources, and a recommendation with limitations. These are example requirements, not research findings or a university's rules.
Days 1-2: turn a broad topic into a plan
They narrow the question to dining operations: how could a university prevent waste, redistribute edible surplus, and manage remaining scraps? They separate questions about environmental effects from questions about local feasibility. The output is a research map with three sections and an owner for each.
In ZuffSuite Whiteboards, Maya can create planning cards for the question, each student's tasks, checkpoints, and the proposed slide sequence. She records the decisions in the planning kit and sends the agreed plan through the group's chosen communication channel. The board organizes the work; the students still confirm assignments themselves.
Days 3-4: build source notes you can use
Each student gathers sources for their section and records author or organization, date, URL, relevant passage, and the claim it supports. Jordan starts with the EPA's Wasted Food Scale, which prioritizes prevention and keeping food available for people. The scale addresses environmental impacts; it does not settle a campus's costs or staffing needs.
They look for peer-reviewed campus studies through the library and local dining information where available. A national source provides context, not a measurement of their own university. If local data cannot be verified, slide 2 says that a campus baseline is needed. They do not invent a survey or claim that a pilot has already succeeded.
In ZuffSuite Documents, they can organize received notes under 'Context,' 'Options,' 'Evidence,' and 'Limitations.' Each note keeps its owner and source details. Maya manually brings the reviewed sections into one outline. See the research notes organization guide for a fuller source-note method.
Days 5-8: approve the outline and assemble slides
The group adopts the 10-slide outline above. Their proposed argument is to measure the local problem, test a prevention approach, and assess routes for surplus and remaining scraps. This is an illustrative recommendation to investigate, not a conclusion from a completed campus study.
Elena sets up the deck in ZuffSuite Presentations, chooses a consistent theme, and manually adds the reviewed outline and source references. Each student provides their slide content and speaking notes. The current presentation editor includes a speaker-notes panel; citations still need to be carried into the slides and checked by the group.
This example works with a coordinator maintaining the master and collecting contributions. Moving content between a board, document, and presentation is a deliberate manual step here. For in-product group access, check current plans and sharing settings first. Free is a personal workspace; supported access depends on the plan and resource. This guide does not assume simultaneous editing.
Days 9-14: check, rehearse, and submit
Jordan checks the source trail, Maya checks the argument, and Elena checks the deck's consistency. During review they remove an unsupported campus saving estimate and label the proposed pilot clearly. The output is a correction list with owners, followed by a revised master.
They rehearse twice, using the complete deck. In the first run, Maya times the sections and the group shortens a lengthy explanation. In the second, they practice speaker changes, advancing slides, and answering a question about missing campus data. USC's group-presentation guidance recommends at least two full rehearsals.
Elena exports the required format, reopens it, and submits the correct version before the deadline. Jordan independently checks the uploaded file and confirmation. Each student keeps the final deck and notes available for presentation day. For longer assignments, adapt the student research project timeline.
8. Free group presentation templates
Download the Free College Group Presentation Planning Kit without an email signup. It includes a filled and blank role assignment sheet, a 14-day timeline with a blank schedule, a six-stage checklist, and a reusable 10-slide outline with room for owners, sources, and speaking notes.
- Replace example names and day numbers with your own details.
- Agree on deliverables and dates together before using the checklist to track progress.
- Mark a task complete only when its output has been posted and checked.
- Keep the same plan available to everyone through your group's chosen channel.
Download the complete printable planning kit (PDF) · Download the complete editable planning kit (Word) · Download all templates together (ZIP)
Role assignment template (PDF) · Role assignment template (Word)
14-day presentation timeline (PDF) · 14-day presentation timeline (Word)
College group project checklist (PDF) · College group project checklist (Word)
10-slide planning outline (PDF) · 10-slide planning outline (Word)
Open the editable and printable browser version. Type into the blank fields, print your completed plan, or save it as a PDF using your browser. Downloaded Word copies can be edited in compatible document software; they are not automatically imported into ZuffSuite.
9. Final group presentation checklist
- Requirements: compare the final deck with the rubric, time limit, speaker requirements, and upload instructions.
- Evidence: trace claims, quotations, figures, and images to the correct sources; remove unsupported statements.
- Slides: check consistent formatting, readable text, terminology, slide order, and reference details.
- Group review: resolve every open correction and confirm ownership of final changes.
- Rehearsal: practice aloud as a group, time every speaker, rehearse transitions, and prepare for an absence.
- Submission: reopen the required export, verify the correct upload and receipt, and keep an offline backup.
On presentation day, arrive with time to test the display and open the file. Decide who advances slides while that person is speaking. Everyone should be able to explain the main recommendation and identify what the evidence cannot establish.
10. Frequently asked questions
How many slides should each group member present?
There is no fixed number. Follow the rubric, then balance speaking time and preparation effort. In our three-person, 10-slide example, students own four, three, and three slides because design and citation work also count toward the workload.
How should a group divide speaking time?
Start with roughly equal time unless the assignment specifies otherwise. Reserve time for transitions and questions if they count toward the limit. Time a complete rehearsal, then shorten or redistribute sections instead of assuming equal slide counts create equal speaking time.
What if a member is absent on presentation day?
Use an agreed backup speaker with access to that section's notes, and contact the instructor as the course requires. Follow the instructor's decision about assessment or rescheduling. Preparing a backup does not give the group authority to decide another student's grade.
How early should a group start?
Begin planning when the assignment is issued. With two weeks available, settle roles and milestones on day 1 and complete source notes by day 4. With five days available, narrow the topic immediately and reserve day 4 for revision and rehearsal.
What should you do if only one person contributes?
Make the missing outputs visible, ask about blockers, and agree on a specific revised commitment. Document what happens and ask the instructor for guidance before the deadline. Avoid silently taking over every task or waiting until the final presentation to raise the problem.
Keep exploring
More guides for your work
Planning guide Oct 3, 2026
How to Plan a Student Research Project: Timeline and Checklist
A four-week example and copyable checklist for moving from an assignment question to a reviewed submission.
Read the guide
Step-by-step tutorial Oct 3, 2026
How to Organize Research Notes for Papers and Presentations
Keep evidence connected to sources, compare ideas by theme, and turn organized notes into a useful outline.
Read the guide
Evaluation guide Sep 27, 2026
AI Document Assistant for Small Business: What It Can Do and What to Look For
A practical look at document-aware and workspace-aware AI: what it can do, where it needs human review, and what to test before a small team relies on it.
Read the guideA workspace for what comes next
Bring your research and next steps together.
Organize notes, shape a document, work through your data, and prepare to present it from one student workspace.